Friday, December 23, 2011

Upsy Daisy Laptop

Stampin' Up! has this great product called Decor Elements--or vinyl art. They are adhesive so you can stick them anywhere--walls, home dec items, or even a laptop. Personalized laptop covers are all the rage right now.  For some of my own personal flair, I added the Upsy Daisy Decor Element in white to the front of mine. 


The Upsy Daisy Decor Element is 13 x 13.
Directions are included--I highly recommned reading them throughly and carefully!
Decor Elements are easy to use, and are removable.
However, they CAN NOT be used more than once!


Start with a clean surface.  I started off by cleaning the front of my laptop with a microfiber cloth.


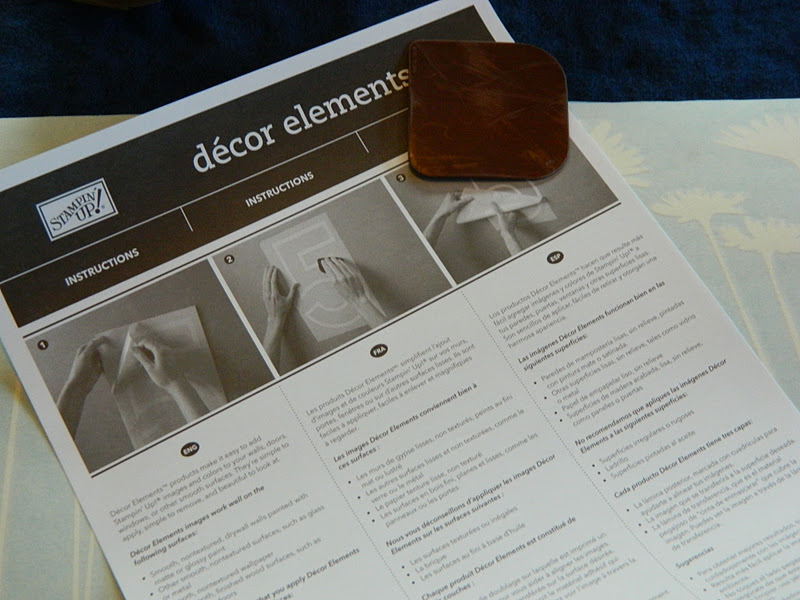
PS--if you can't find the applicatior tool (separate purchase),  you can use a Pampered Chef pan scraper.  


First, turn the vinyl art over so the grid is face up.  Rub the Applicator Tool over the entire surface.  Slowly and carefully peel the grid paper away from the image. 


Stick it where you want it--very carefully, of course!


With the applicator tool, rub the image onto laptop. 
Carefully, and slowly pull the image sheet away from the laptop. 


My laptop is 17" and it took two Upsy Daisies to stretch across the front.  One is used exactly as it is out of the packaging.  I cut up the second one to "fill" in the edges.  I will save the leftover flowers for some future project. 

Sunday, December 11, 2011

December Stamp Club Swaps

Hi Stampers!  The Rubber Duckies have been busy...here's our December Stamp Club swaps....


Heather stamped this one, and even decorated the inside.


Need a quick party favor?  Add a die cut Top Note to a cell bag full of candy--viola!
Created by Frances

Joan createad this lovely snowman card.

Lisa created the scrapbook page using Tree Trimmings stamp set.


Kim created the Happy Holidays card.  The red flowers are made with the 5-Petal Flower Punch and Red Glimmer Paper from the Holiday Mini. The background is embossed with Petals a Plenty Embossing Folder. 


Mary created the cardinal card using the Beautiful Season stamp set. 
The background is the Snow Burst Embossing Folder. 


Barbara created the butterfly card.  The flowers are embossed with the Elegant Bouquet folder.  Color was added to the flowers with Stampin' Pastels.  The butterflies were made with the Beautiful Wings Embosslit.


Tina created this thank you card.   She punched a shape out of the card front, and added the thank you verse stamped on Vellum. 


The inside has been decorated too!


Debbie created this adorable little box, which would also make a great party favor.


Last but not least...Paige's.

Saturday, December 10, 2011

Clear Mount Stamp Case Notepad

Merry Christmas, Stampers!  For December Stamp Club, we made Clear Mount Stamp Case Notepads--say that 3xs fast, lol!   


Clear mount stamps come inside these cases, and empty cases can be bought for $5.95 (set of 4).  And you will need a 5 x 8 notepad.  It's best to get these from your office supply store.  They have a really cool machine that will lop an inch off the bottom of your notepads for free, which you will need to do so your notepad will fit inside the plastic case. 

For the case cover, you will need a 10 5/8 x 7 and a 1 1/2 x 10 5/8 strip of DSP (Paisley Petals).  Layer the strip on top of the larger piece of DSP.  Stamp your initial from Lovely Letters (Cherry Cobbler on Whisper White).  Punch out with the 1 3/8 Circle Punch.   Attach on top of coordinating 1 3/4 Scallop Punch.  Slide in plastic sleeve of the stamp case.


Don't forget to decorate the top of your notepad with a strip of DSP (mine was1 1/2 x 5).  Besides, the store logo doesn't really match the DSP. 

Wishing you lots of stamping time this holiday season!
Bye for now, Maria

Friday, December 9, 2011

Peaceful Merry Christmas


Hi Stampers!  Here's a super simple, but elegant and "peaceful" Christmas card.  Start with your standard card base.  Add a strip of Cherry Cobbler cardstock 2 x 5 1/2.  Using the Bird Builder, punch out a piece of Whisper White and Lucky Limeade cardstock.  To attach the leaf part of the Bird Builder punch, apply adhesive to the back of your bird, and press the leaf's stem onto the adhesive.  Then, attach your Bird to Cherry Cobbler cardstock (rather than trying to apply glue or adhesive to such a small item separately).  The wing is popped up with a Stampin' Dimensional.  Stamp Merry Christmas from Hand-Penned Holidays (Holiday Mini) in Cherry Cobbler on front of card.

Thursday, December 1, 2011

Butterflies and Watercolor Crayons

This package of Watercolor Wonder Crayons arrived via UPS on a hot summer day.  Isn't it a beauty?  Stampin' Up! replaced them with no questions asked--they're good like that!  


What to do with melted water color crayons while you are unpatiently waiting for your replacement?  Is "unpatiently" even a word, lol?  While I'm not a patient person, I am good at making up my own words!
 

Start with die cutting a Top Note out of Water Color Paper.  Emboss with Final Press, Vintage Wallpaper, and Petals a Plenty embossing folders.  Peel wrapper from water color crayon and rub it flat against the raised embossed image.  Spritz with water and allow to dry.  Note to self:  do not order water color crayons on the hottest day of the summer!!  By the way, you do not need melted crayons for this technique.  Try the technique, but please DO NOT melt your crayons in order to do so, lol!!!


What is it about butterflies?  I am fascinated by them.  They are amazing creatures--to go from a caterpillar to a beautiful butterfly in such a short time.  I love butterflies and I love to stamp them!  What in nature inspires you creatively?  Happy Stamping!  Bye for now, Maria 

Other supplies used:  Beautiful Butterflies Bigz Die, Glimmer Brads, 1/2 Stitched-Poly Ribbon in Blushing Bride and Concord Crush, Jewelry Tag Punch, Large Oval Punch, Decorative Label Punch, Linen Thread, Rhinestone Brads, Just Add Cake DSP.

Tuesday, November 29, 2011

Scrap & Stamp Arts Magazine

Hi Stampers!  One of my cards has been published in the December 2011 Scrap & Stamp Arts magazine--very exciting!  You should be able to find it on newstands now.  I would be happy to autograph your copy, lol.  The flowers were from a box of candies my sweetie gave me. 


Happy Stamping!  Bye for now, Maria

Monday, November 28, 2011

Raining Flowers

Hi Stampers!  Here's a few cards using the Raining Flowers stamp set.  This was a set we received at Convention. I used Wisteria Wonder, Concord Crush, and Pear Pizzaz for the cardstock and ink colors.


Use the Color Spritzer for the speckles. 
And the Decorative Label punch as a corner rounder.


For a "christmasy" look, I used Cherry Cobbler and Always Artichoke on this one for the cardstock and ink.  The embossed background is Elegant Bouquet Embossing Folder.  Love the versatility of rubber stamping! 

Saturday, November 19, 2011

November Stamp Club

Hi Stampers!  Here's the project from November Stamp Club.  The background was done with a brayer.  When you ink up a brayer, you want to continually roll the brayer across the ink pad in a forward motion.  In other words, don't move the brayer back and forth on the ink pad.  If you just roll the brayer back and forth on the ink pad, you will have a spot on the roller that will not have ink on it.  Once you've inked up the brayer, NOW you can roll the brayer back and forth on your cardstock. 


I 'm using Pool Party and Basic Black Classic Inks.
Stamp Set is Uppsy Daisy.


I wasn't really digging the black so I changed it to Pacific Point, but I did stamp the Happy Birthday in Basic Black.  Base card in Pacific Point cardstcok is 8 1/2 x 5 1/2 folded in half--that's how I make all my cards.  That way you get two cards from one sheet of cardstock.  Middle layer is Basic Black (5 1/4 x 4) and the top layer is Whisper White cardstock (5 x 3 3/4).  Add a Rhinestone above the "i" for a little bling.


Here are the Rubber Duckie's card swaps form this month's club.  I've left off some names of the creators simply because I do not know who made what--so sorry!  Please let me know which one is yours so I can give you proper credit. 


Just Believe card by Barbara...Flower Garden Embossing Folder. 
Color with Stampin' Pastels over the embossed image.


Tina made this lovely Happy Holiday card using Snow Much Fun stamp set.


Barbara made this card using the Owl Builder Punch.


Frances and her daughter, Elizabeth, made this Christmas card using Loads of Love.


Thankful for...is made by Paige.  The swirls are actually embossed--very neat effect!


Mary made the "it's your day" card using the Great Day Simply Sent Kit.


Heather made this lovely round fold over card. 
It's hard to see from the photo, but the flowers were stamped with the Versamark ink pad.


Lisa made this Thanksgiving scrapbook page. 

Happy Fall!  Happy Thanksgiving!  Happy Stamping!