 Time to step it up a little for this emboss resist card. Add an additonal die cut leaf, a button and some linen thread. Turn the direction of the card for a different look.
 Monday, September 17, 2012
Emboss Resist Part 3
Time to step it up a little for this emboss resist card. Add an additonal die cut leaf, a button and some linen thread. Turn the direction of the card for a different look. Sunday, September 16, 2012
Emboss Resist Part 2

This card also uses the emboss resist technique. The only difference between this card and the one from September's Stamp Club is the Early Espresso Core'dinations Cardstock, which has a lighter core than other cardstock. When the raised image is sanded the lighter core is revealed.

After sanding, you will want to remove the fuzz balls with the Dust Buddy.


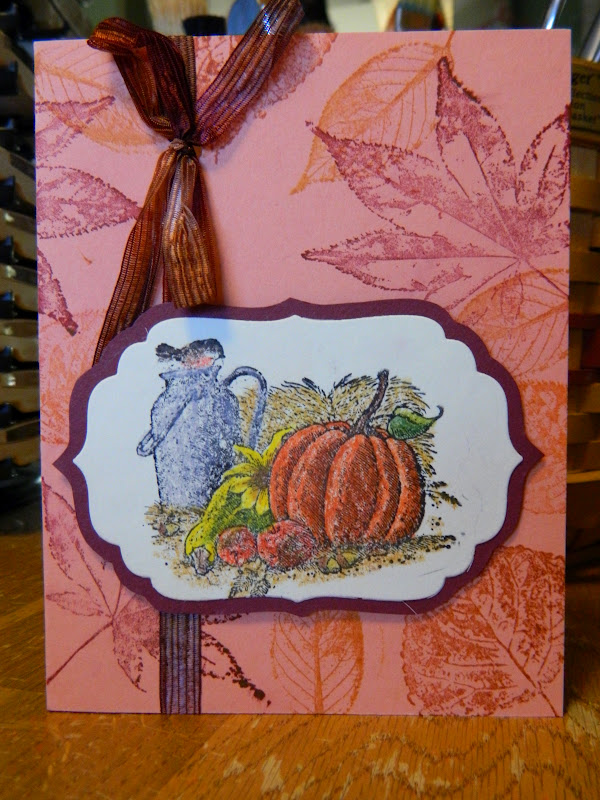
Saturday, September 15, 2012
September Stamp Club: Emboss Resist

The technique for September's stamp club project is called emboss resist. Emboss the image with clear embossing powder. Then, apply ink by sponging or brayering ink onto the cardstock. Lightly buff the embossed image with a tissue to remove any excess ink.

Or, you could use Natural Composition DSP--it is already clear embossed. How's that for a time saver? First, die cut the DSP with the Autumn Accents Bigz Die. Sponge with More Mustard and Cherry Cobbler ink working light to dark. "Hello" comes from Lacy & Lovely. Other supplies used on this card: Decorative Label Punch, Woodgrain embossing folder, Early Espresso Cardstock and Ink, Crumb Cake Cardstock. Happy Stamping! Bye for now, Maria
Friday, September 14, 2012
September Stamp Club Swaps
A few items from our monthly swap....

To make this adorable little envelope that holds a gift card, Tina says start with a 4 1/2" piece of DSP. Using the Simply Scoring Tool with the Diagonal Plate, score at 2 5/8 on two opposite ends, and at 1 5/8 on the on the other two opposite ends. Fold sides in, fold bottom up, and cut point off top. Glue bottom edges up to the sides. Fold flap down, and round with corner rounder.

Add velcro rounds to secure gift card inside.

Pam made this lovely notecard with the Snow Festival Designer Printed Tags and Festival of Prints DSP Stack. The stack is 48 sheets of 4 1/2 x 6 1/2 double sided DSP. Cut a sheet in half and it makes the perfect layering piece for a Notecard. The tags leave plenty of room to stamp your favorite sentiment.

Now, this card may look like it was made out of a paper bag, but I assure you it wasn't. It was made from the brown packing material that comes in our Stampin' Up! orders. It was ironed to flatten out the crinkles and then stamped and embellished like a normal piece of cardstock--this is called upcycling not recycling!


Marcia created this adorable little bunny card.

Joan created this wonderful fall card.
Susan created this tea bag holder.
This is the treat holder from August 3, 2012 post.

Until next month...happy stamping! Bye for now, Maria
Subscribe to:
Comments (Atom)