Showing posts with label Techniques. Show all posts

Thursday, December 4, 2014

Throwback Thursday: Watercolor Thank You

I'm really "throwing it back" with these cards.  The parchment style cardstock and rainbow ink pads are from years ago--been hoarding them for a looooonnnnnnnggggg time.  Stampin' Up! used to sell the ink pads when I first became a demonstrator.  Today, I dug out a bunch of supplies that have been sitting around literally collecting dust.  


The stamp is called Watercolor Thank You, and is sold all by itself.  

You can do this technique with any of our Classic Ink Pads.   

After stamping, drag an Aqua Painter (filled with water, of course) over the image.  Use enough water to "pull" the color, but not too much you turn the cardstock back into pulp, which is what I usually do because I squeeze the barrel of the aqua painter way too hard--hold my pencil to tight too!!!

On the autumn thank you, I added a dotted outline with a gold paint pen.  I added dots to the blue thank you with a white gel pen, but it's hard to see in the photo.  

To finish the card, I added ribbon, turned up one of the corners, and added a leaf die cut from the Autumn Accents Bigz die.  

Supplies used:
Watercolor Thank You Stamp
Aqua Painter
Big Shot with the Autumn Accents Bigz Die
White Gel Pen
Silver Glimmer Paper
DSP shown on the Autumn card--retired and name unknown

Non-Stampin' Up! supplies used:
Gold Paint Pen
Parchment Cardstock
Rainbow Ink Pads

Get those supplies out.  Try a new technique.  Happy Stamping!  Bye for now, Maria

Tuesday, September 10, 2013

September Stamp Club: Markers and Clear Block Technique


Hi Stampers!

I saw markers applied directly to a clear block, and then using the block as the stamp at the Baltimore Regional back in the spring. Can you believe its September already?  I can't believe it took me this long to try out this fun technique!  For September's club project, we're trying this technique. Swipe Pool Party and Pear Pizazz markers on clear stamping block C. Mist with water. Press block onto Whisper White CS (3 x 2 3/4).  Allow ink to transfer before lifting block.  Let dry. Stamp with butterfly from Best of Butterflies and "just because" from A Dozen Thoughts with Island Indigo ink. Layer on Island Indigo CS (3 1/2 x 3). Emboss strip of Pear Pizazz CS with Woodgrain embossing folder (5 1/2 x 1 3/4). Add to Pool Party card base, cut to 4 1/4 x 11, folded in half.  Add butterfly to front of card with Stampin' Dimensionals.  Stamp another smaller butterfly on the front of your card in Island Indigo. Happy Stamping!  Bye for now, Maria

Monday, February 11, 2013

Ascending Rectangles Card


My card swap from October is a technique called Ascending Rectangles.  Yes, I said October as I am a bit behind, but it is still winter!  Take three layers of cardstock for stamping (see below), and place them on top of each other.  Stamp snowflake randomly--you are stamping on all 3 three pieces of cardstock at the same time.  Here I used a snowflake from Snowflake Soiree and the Illuminate Glimmer Watermark stamp pad, both of which are still available (see page 36 Spring 2013 catalog).

Here are the measurements....
Cardstock bases:
8 1/2 x 5 1/2
3 1/4 x 4 1/2
2 1/4 x 3 1/2
Cardstock for stamping:
4 x 5 1/4
3 x 4 1/4
2 x 3 1/4
Hope you enjoy it, and I hope you are enjoying winter where you live!  So far, we've escaped any accumulation of snow, which is sad because I'm looking forward to a good stay in my pj's all day and stamp the snow day away type day.  Happy Stamping!  Bye for now, Maria


Saturday, February 9, 2013

Embossed Cardstock Strips


You know how to emboss with the Big Shot and an embossing folder.  Here it's the same concept, but instead of a single sheet of cardstock, you will use strips of cardstock.  I used the Vine Street embossing folder--see your Salabration folder.  This folder will NOT carry over into any other Stampin' Up! catalog--Stampin' Up! said so! 

Stamps:  Bloomin' Marvelous

Ink:  Island Indigo, Summer Starfruit

Cardstock:  Sahara Sand, Pool Party, Summer Starfruit, Rich Razzleberry, Island Indigo

Other:  Oval Punch, Sycamore Street Ribbon (Salabration)

Monday, September 17, 2012

Emboss Resist Part 3

Time to step it up a little for this emboss resist card.  Add an additonal die cut leaf, a button and some linen thread.  Turn the direction of the card for a different look. 

Sunday, September 16, 2012

Emboss Resist Part 2


This card also uses the emboss resist technique.  The only difference between this card and the one from September's Stamp Club is the Early Espresso Core'dinations Cardstock, which has a lighter core than other cardstock.  When the raised image is sanded the lighter core is revealed. 


After sanding, you will want to remove the fuzz balls with the Dust Buddy.


Saturday, September 15, 2012

September Stamp Club: Emboss Resist


The technique for September's stamp club project is called emboss resist.  Emboss the image with clear embossing powder. Then, apply ink by sponging or brayering ink onto the cardstock.  Lightly buff the embossed image with a tissue to remove any excess ink. 


Or, you could use Natural Composition DSP--it is already clear embossed.  How's that for a time saver?   First, die cut the DSP with the Autumn Accents Bigz Die.  Sponge with More Mustard and Cherry Cobbler ink working light to dark.  "Hello" comes from Lacy & Lovely.  Other supplies used on this card:  Decorative Label Punch, Woodgrain embossing folder, Early Espresso Cardstock and Ink, Crumb Cake Cardstock.  Happy Stamping!  Bye for now, Maria

Saturday, August 11, 2012

August Stamp Club: Flip Card

I received a "flip" card at Convention...definetly wanted to try it out...so here's our project for this month's club project.


Cut cardstock to 7 1/2 x 4 1/4
Score at 2 3/4 and 3 3/4

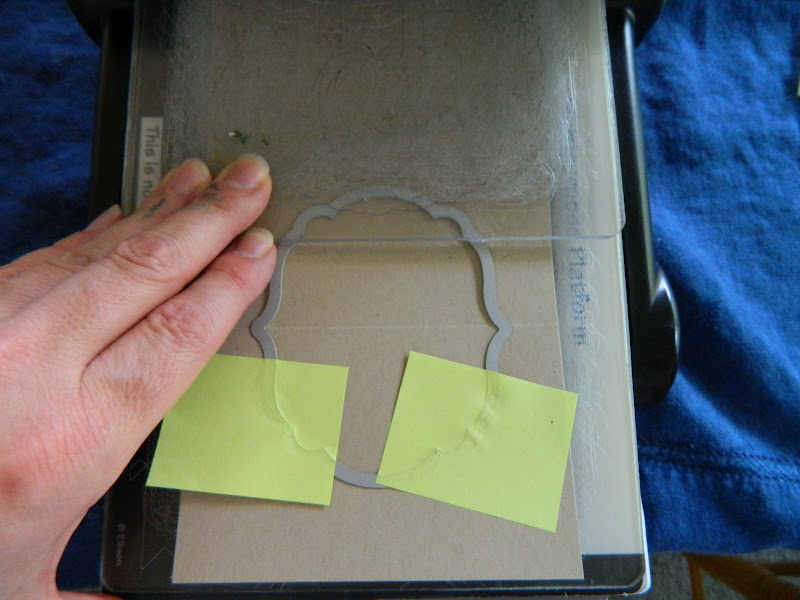
Using Tab 2, place the Labels Framelit on the 2 3/4 crease (a sticky note can be used to hold framelit in place).  Place the Cutting Plate on top, but only up to the crease, and then run through the Big Shot.  Without lifting the Framelit, flip your card around and place the Cutting Plate on the 3 3/4 crease. 
This is what it should look like....

Crease and fold...stamp...embellish.


Happy Stamping! Bye for now, Maria

Monday, November 28, 2011

Raining Flowers

Hi Stampers!  Here's a few cards using the Raining Flowers stamp set.  This was a set we received at Convention. I used Wisteria Wonder, Concord Crush, and Pear Pizzaz for the cardstock and ink colors.


Use the Color Spritzer for the speckles. 
And the Decorative Label punch as a corner rounder.


For a "christmasy" look, I used Cherry Cobbler and Always Artichoke on this one for the cardstock and ink.  The embossed background is Elegant Bouquet Embossing Folder.  Love the versatility of rubber stamping! 

Saturday, November 19, 2011

November Stamp Club

Hi Stampers!  Here's the project from November Stamp Club.  The background was done with a brayer.  When you ink up a brayer, you want to continually roll the brayer across the ink pad in a forward motion.  In other words, don't move the brayer back and forth on the ink pad.  If you just roll the brayer back and forth on the ink pad, you will have a spot on the roller that will not have ink on it.  Once you've inked up the brayer, NOW you can roll the brayer back and forth on your cardstock. 


I 'm using Pool Party and Basic Black Classic Inks.
Stamp Set is Uppsy Daisy.


I wasn't really digging the black so I changed it to Pacific Point, but I did stamp the Happy Birthday in Basic Black.  Base card in Pacific Point cardstcok is 8 1/2 x 5 1/2 folded in half--that's how I make all my cards.  That way you get two cards from one sheet of cardstock.  Middle layer is Basic Black (5 1/4 x 4) and the top layer is Whisper White cardstock (5 x 3 3/4).  Add a Rhinestone above the "i" for a little bling.


Here are the Rubber Duckie's card swaps form this month's club.  I've left off some names of the creators simply because I do not know who made what--so sorry!  Please let me know which one is yours so I can give you proper credit. 


Just Believe card by Barbara...Flower Garden Embossing Folder. 
Color with Stampin' Pastels over the embossed image.


Tina made this lovely Happy Holiday card using Snow Much Fun stamp set.


Barbara made this card using the Owl Builder Punch.


Frances and her daughter, Elizabeth, made this Christmas card using Loads of Love.


Thankful for...is made by Paige.  The swirls are actually embossed--very neat effect!


Mary made the "it's your day" card using the Great Day Simply Sent Kit.


Heather made this lovely round fold over card. 
It's hard to see from the photo, but the flowers were stamped with the Versamark ink pad.


Lisa made this Thanksgiving scrapbook page. 

Happy Fall!  Happy Thanksgiving!  Happy Stamping!


Friday, August 26, 2011

August Stamp Club: Strength & Hope Scrapbook Page

August's Stamp Club project is a 6x6 scrapbook page using the Strength & Hope Stamp Set (deadline August 31th).  You'll notice the butterfly is several colors.  It's a technique called Rock 'n Roll.  Very easy and will impress all your friends!  The photo mat is 5 1/2 x 4.  


To rock 'n roll with your stamps, you need two ink pad colors.  Start with the lighter of the two, and ink your stamp like you normally would.  Then, gently roll the edges of your stamp around on the darker color ink pad.  Stamp as usual on Whisper White cardstock.  Crumb Cake and Marina Mist is used here.  You will get ink on your wood block--it's ok!  If you are making more than one, clean your stamp so you won't muddy your ink pad. 


Supplies used: Crumb Cake, Marina Mist Ink & Cardstock
Whisper White Cardstock
Strength & Hope, Vintage Vogue Stamp Sets
Modern Label Punch

Some of this months' card swaps...

Z fold card from Frances reveals a hidden message.


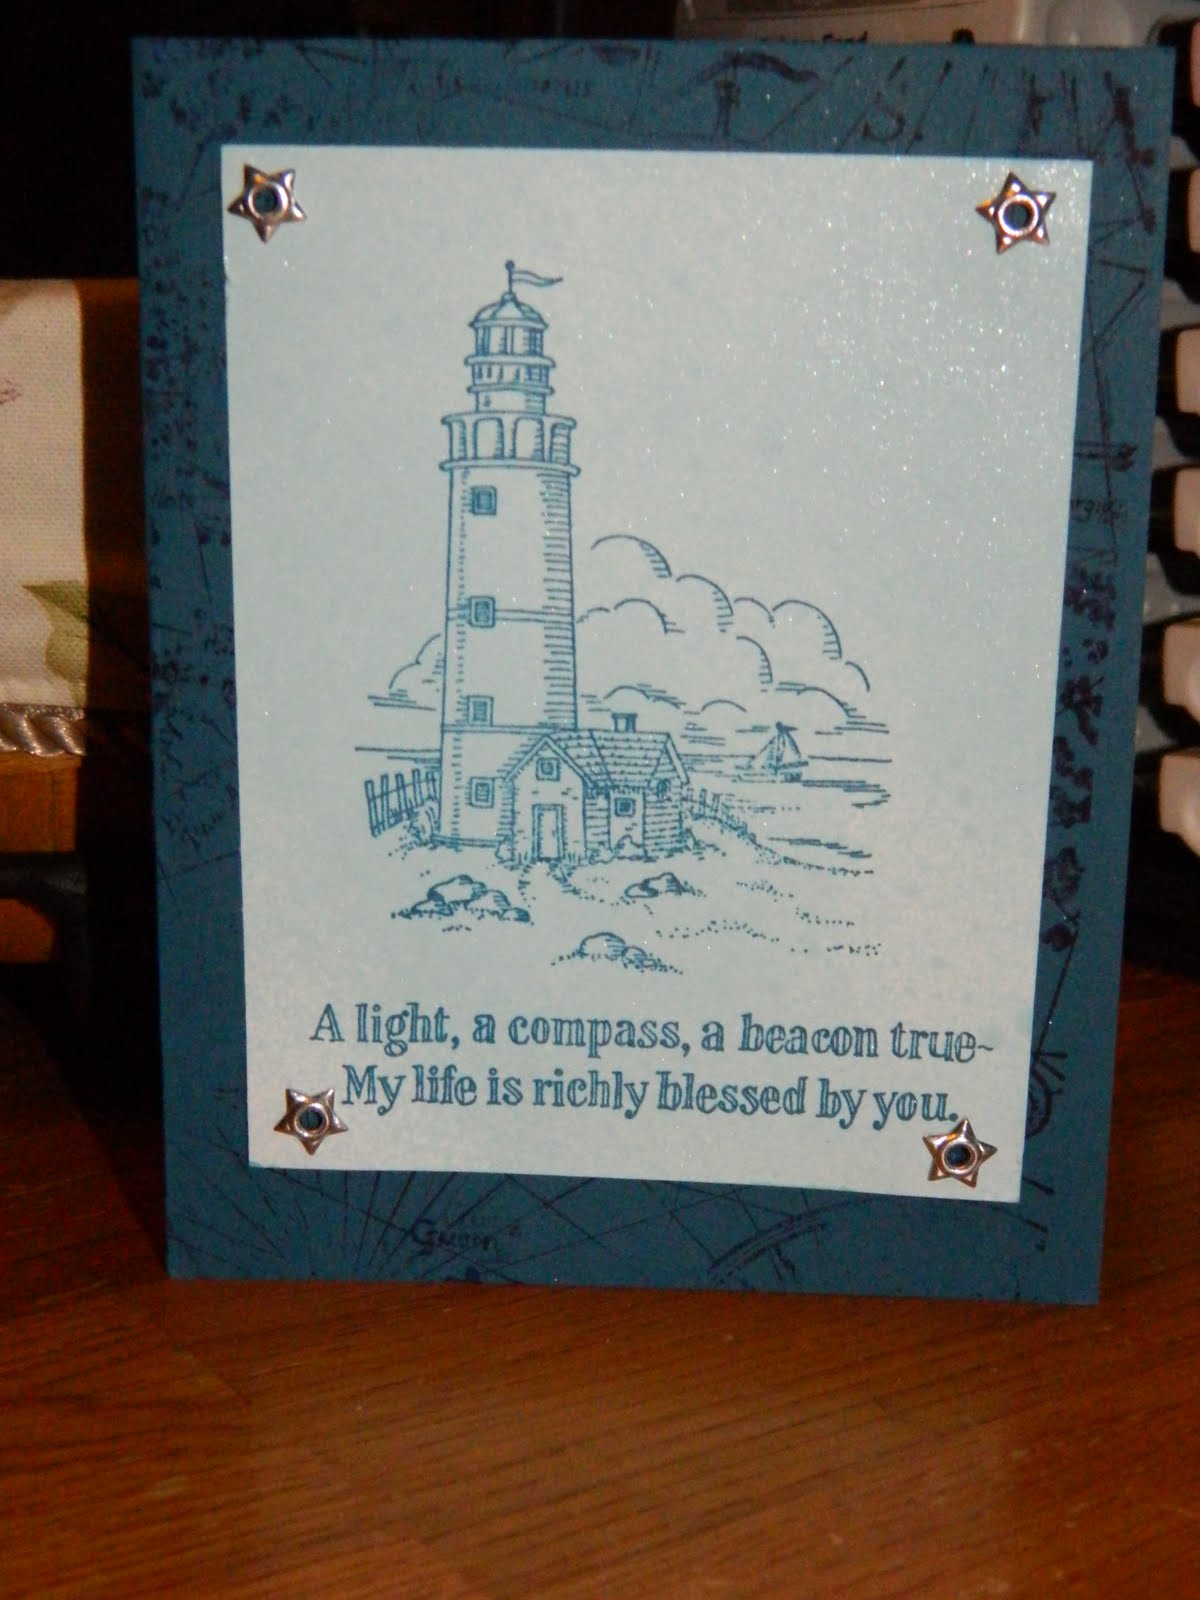
 Lighthouse card from Mary.


 Paige stamped this card using the new host set called Simply Soft (p. 12 IB&C). 


 Birthday wishes from Kim.


 Tina made the baby tag.


Nautical card using The Open Seas from Barb with the inside decorated.   


My card swap.   


The brown paper is from Stampin' Up!  No, you can't buy it.  Consider it a free gift with purchase.   No, its not that either.  Its the packing material that SU! uses to protect our orders during delivery.  

  
The more crumpled the better.  Smooth it out and die cut with the Fun Flowers die.  Stamp as desired.  Here I used Pattern Pieces from the Spring Mini.  Assemble into layered flowers with a brad and attach to the front of your card. 


Happy Stamping! Bye for now, Maria