
Showing posts with label June Stamp Club. Show all posts
Showing posts with label June Stamp Club. Show all posts
Saturday, June 13, 2015
June Stamp Club
Due to a personal emergency, we did not meet in June. Thank you so much for your understanding, support, and encouragement during this time. My husband was in a terrible accident from a fall off a ladder. You can read about it here... http://www.danthetreeman.blogspot.com/


Saturday, June 7, 2014
June Stamp Club: Treat Pouch
In April, I had the opportunity to attend the first ever Catalog Premier. And, even better than attending the first ever Catalog Premier Event by Stampin' Up! was attending with my downline--I love them!!! THEY ROCK!!!! This month's project is a little goodie holder that was demoed at the event.


Create a tag and attach with clothespin to keep pouch closed.

Starburst and Banners Framelits along with the 1 3/8" circle punch are used on the tag.

Mini Metallic Clothespins
Happy Stamping! Bye for now, Maria

Using a piece of DSP 4 1/2 x 6 1/2, score at 1", 1 1/2", 2", 4", 4 1/2" and 5". If you use the DSP paper stacks, the DSP is already 4 1/2 x 6 1/2--no cutting necessary!!! Moonlight Designer Series Paper Stack used here.

Tip for scoring: score your bottom score on the edge that has the Stampin' Up! copyright sign so you won't see it on your completed pouch.

Cut off part of the bottom to make your tab. Glue together. If you glue the flap on the outside of the pouch it will look like those old-timey coin envelopes.


Create a tag and attach with clothespin to keep pouch closed.

Starburst and Banners Framelits along with the 1 3/8" circle punch are used on the tag.

Stamp set: Work of Art
Other Supplies used:
Lost Lagoon, Hello Honey Cardstock and Ink
Whisper White Cardstock
Lost Lagoon 3/8" Stitched Satin Ribbon and Linen ThreadMini Metallic Clothespins
Happy Stamping! Bye for now, Maria
Friday, June 7, 2013
Mosaic Madness
This card is a total CASE (copy and share everything) from Shelli (CEO at SU!) at the Baltimore Regional this past April. I love the new set Mosiac Madness, but I love all things rubber stamping and SU!, right? Of course! It coordinates with a embossing folder and punch--yup, love that too! One of the great things about SU!--everything goes together.

Supplies:
Mosaic Madness Stamp Set
Mosaic Punch & Embossing Folder
Itty Bitty Punch Pack
Quatrefancy DSP
Whisper White, Island Indigo, Pumpkin Pie, Daffodil Delight, Pool Party CS
Pumpkin Pie Reinker, Spritzer, Isopropyl Alcohol (70%)
Rhinestones
Saturday, July 14, 2012
June Stamp Club: Explosion Card
Since I enjoyed creating explosion cards so much (see previous post), I thought it would make a great stamp club project for June. This version is much smaller, but just as wonderful!


Start with a 6" square piece of cardstock. You can get four cards from a 12x12 piece of cardstock, but you probably already knew that! Score it at 3" on both sides and diagonally just once. The cover is made with two 3" squares of cardstock and one piece of 2 3/4" squared piece of Very Vanilla. You will need two 2 3/4" square pieces of DSP cut in half on the diagonal to decorate the inside.

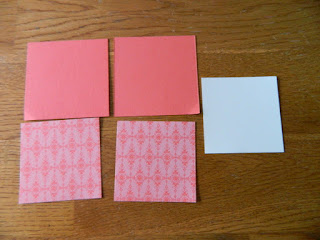

Add DSP to the inside--alternate that pattern--show off that DSP!!! Stamp, sponge and embellish as desired. Fold up. Attach ribbon with Sticky Strip. Add covers.

Supplies used: Very Vanilla cardstock, Calypso Coral Cardstock, ink, ruffled ribbon and DSP from the In Color DSP Stack, Chocolate Chip ink, Stampin' Sponge, Sticky Strip, and Blooming with Kindness Stamp set (this set is sooooooo beautiful!!!).
Until next month, Maria

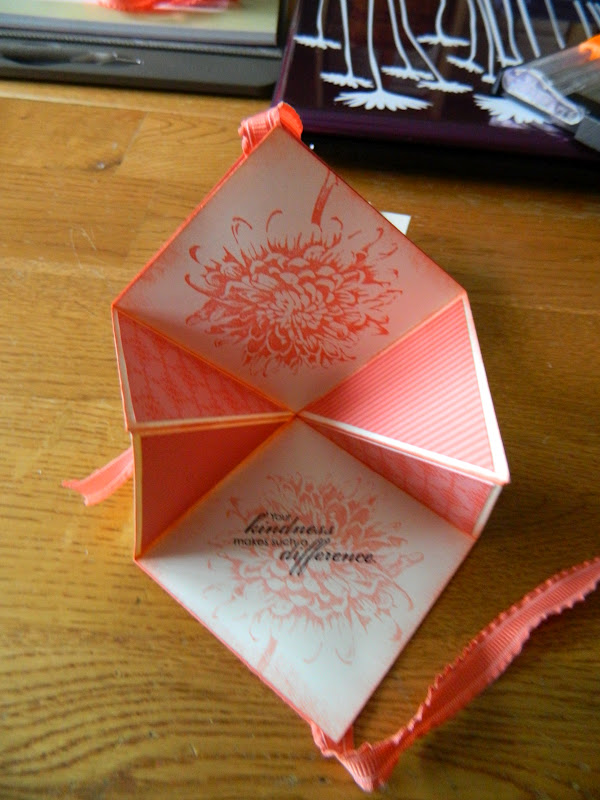


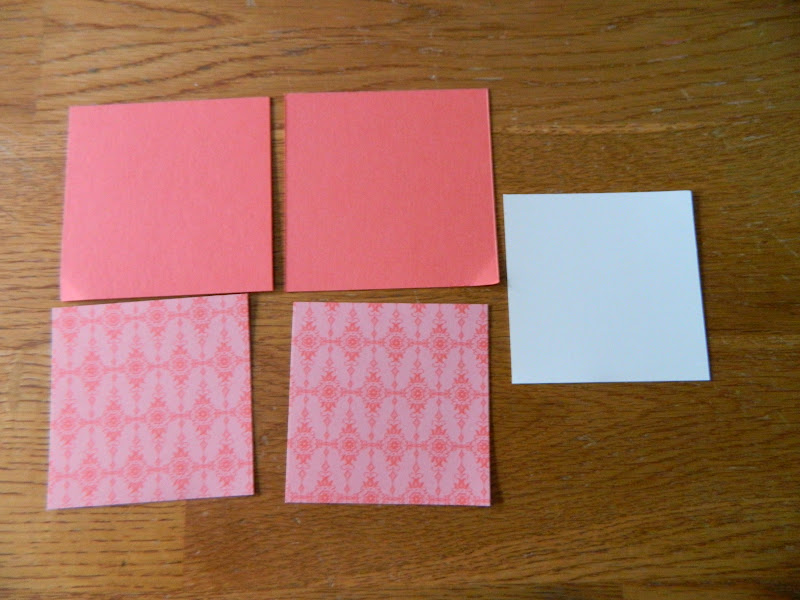


Supplies used: Very Vanilla cardstock, Calypso Coral Cardstock, ink, ruffled ribbon and DSP from the In Color DSP Stack, Chocolate Chip ink, Stampin' Sponge, Sticky Strip, and Blooming with Kindness Stamp set (this set is sooooooo beautiful!!!).
Until next month, Maria
Monday, June 11, 2012
Gift Card Holder Photo Tutorial
June is full of graduations. Not including my own gradution, I had several to attend this month. Gift cards are the perfect gift...they are never the wrong color or size. We made a gift card holder for June's Stamp Club project.


On the 5 1/2 side, score at 3".
Add Sticky Strip to the 1/2" flap.


Fold over and adhere.


Stamp as desired. Here I'm using a butterfly from Papillon Potpourri in Gumball Green.

Stamp your cardstock insert (Very Vanilla 2 1/4 x3 3/4 ).


Add ribbon (Gumball Green 3/8" Stitched Satin Ribbon), cardstock insert and gift card.

Happy Stamping! Bye for now, Maria

Starting with your favorite cardstock or DSP (here I'm using First Edition) cut to 6 1/2 x 5 1/2.
On the 6 1/2 side, score at 1/2" and 3".


Fold over and adhere.
Looks like a flattened tube.

Fold up on that 3" score line.
You should have 2 "pockets"--one for a piece of cardstock to add a sentiment
and one for the gift card.

This is a view of the "pockets" from the other direction.

Crease your folds.

Stamp as desired. Here I'm using a butterfly from Papillon Potpourri in Gumball Green.

Stamp your cardstock insert (Very Vanilla 2 1/4 x3 3/4 ).
Stamp whatever greeting you desire, or write your own note to the recipient.


Add ribbon (Gumball Green 3/8" Stitched Satin Ribbon), cardstock insert and gift card.

Happy Stamping! Bye for now, Maria
Subscribe to:
Posts (Atom)